Struggling with a malfunctioning garage door sensor? This guide on how to reset a garage door sensor provides clear, effective steps to get your door working again.
Garage door sensors are vital safety components that prevent accidents and protect your property. When they malfunction, your door may not close properly—or at all. If you’ve been asking how to reset a garage door sensor, you’re already on the right track to resolving the issue.
Sensor issues often arise from minor misalignments, dirt buildup, or brief electrical interruptions. A simple reset can restore function and save you from more costly repairs. Knowing how to reset the garage door sensor correctly can make all the difference.
In this guide, we’ll walk you through a trusted, step-by-step process to reset your garage door sensor and get your system running smoothly again.
What Are Garage Door Sensors and Why Do They Fail?
Garage door sensors work by sending an invisible beam across the base of the door opening. If anything breaks the beam, the door won’t close. This is a crucial safety feature, especially for households with children or pets.
Common causes of sensor malfunction include:
- Sensor Misalignment: Over time, vibrations from regular use or accidental impact, such as bumping into the sensor with a broom or vehicle, can cause the sensors to become misaligned. If the sensors are not pointing directly at each other, the beam will be disrupted, and the door may not close properly.
- Obstructions or Dirty Lenses: Dust, dirt, spider webs, or other debris on the sensor lenses can block the infrared beam. Even a thin layer of grime can interfere with proper functioning. Regular cleaning with a soft cloth can help maintain sensor performance.
- Loose or Damaged Wiring: The wiring that connects the sensors to the garage door opener can become loose or damaged over time, especially in garages with a lot of activity. Rodents, corrosion, or general wear and tear can also be culprits. Faulty wiring can prevent the sensors from communicating correctly with the door opener.
- Power Issues: Power interruptions, such as surges, outages, or tripped breakers, can temporarily disable the sensors or affect their calibration. After the power is restored, this may require resetting the opener system or rechecking sensor alignment.
How to Reset Garage Door Sensor: Step-by-Step Instructions
Step 1: Turn Off the Power
Safety first. Disconnect the power to the opener before you work on your new garage door system. This can usually be done in one of two ways:
- Unplug the opener from the ceiling-mounted power outlet.
- Flip the corresponding switch on your home’s circuit breaker panel.
Disabling the power helps prevent electric shock and ensures the door doesn’t accidentally activate while you’re working near it. To avoid interruptions, inform others in your household that the system is offline.
Step 2: Clean the Sensor Lenses
Over time, the lenses on the garage door sensors can accumulate dust, dirt, spider webs, or other debris that can interfere with the infrared beam.
- Use a soft, lint-free cloth (microfiber works well) to wipe the lenses on both sensors gently.
- Avoid using harsh cleaners or spraying liquids directly on the sensors, as moisture can damage the electronics.
A clean lens can often restore proper function if buildup blocks the beam.
Step 3: Check Sensor Alignment
For the sensors to function correctly, they must face each other directly at the same height.
- Inspect the position of each sensor at the bottom of the garage door tracks.
- Use a tape measure to ensure both are mounted at equal heights (usually 4–6 inches off the ground).
- If you suspect misalignment, gently adjust the sensors by hand. Most brackets allow some movement for fine-tuning.
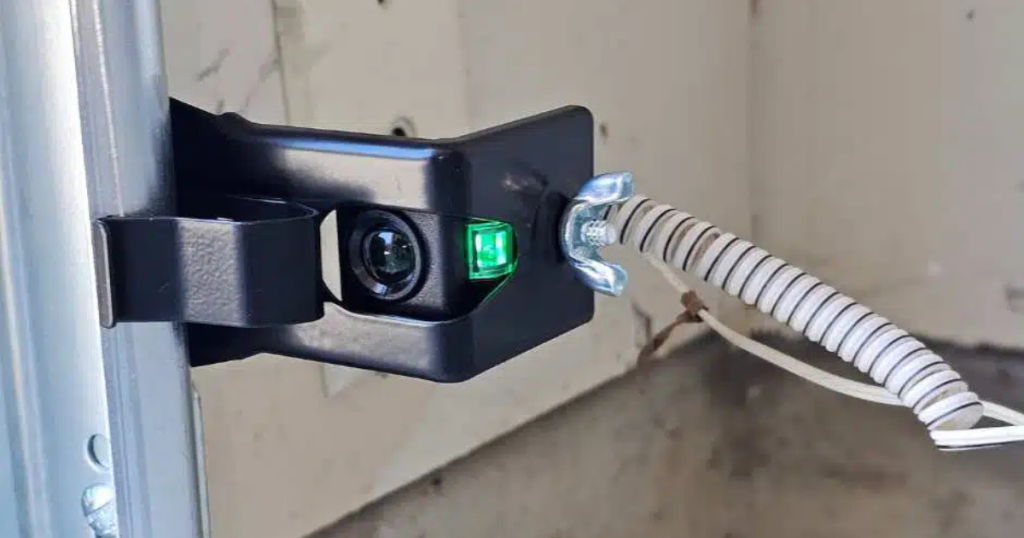
- Most sensors have a small LED indicator light. When aligned correctly, both lights should glow steadily. A blinking or off light often indicates misalignment or another issue.
Carefully align the sensors—this is one of the most common causes of garage door sensor failure.
Step 4: Inspect the Wiring
Wiring issues can also cause sensors to malfunction.
- Visually inspect the wires running from each sensor back to the opener unit.
- Look for signs of wear such as frayed insulation, loose connections, corrosion, or rodent damage.
- Gently tug on connections to check for looseness, and tighten any screws or terminals as needed.
- If you find severe damage or exposed wiring, it’s best to consult a technician rather than attempting electrical repairs yourself.
Secure any dangling wires to the wall or ceiling using clips or fasteners to prevent future issues from vibration or accidental tugs.
Step 5: Restore Power and Test the Door
Once everything is cleaned, aligned, and inspected:
- Plug the opener back in or flip the breaker back on.
- Test the garage door using the wall-mounted control panel or your remote.
- Observe the sensors as the door closes. If the sensor lights remain steady and the door closes smoothly without reversing, your reset was successful.
If the door still won’t close, repeat the alignment steps and verify wiring.
Troubleshooting Tips After Resetting Your Sensor
After resetting your garage door sensor, you might still experience some issues. Here are some expanded troubleshooting tips to help you identify and resolve common problems:
- Sensor light still blinking?
If one or both sensor lights are still blinking after a reset, this usually indicates a misalignment. Carefully inspect the sensors to ensure they face each other directly at the same height. Even a slight misalignment can prevent the door from operating correctly. Also, clean the sensor lenses with a soft cloth to remove any dust or debris that might interfere with the signal. - Door reverse before closing?
If the garage door begins to close but then reverses immediately, check for obstructions along its path. This includes small objects, uneven flooring, or items on the track that could trigger the sensor’s safety mechanism. Ensure the track is clear and the area around the door is clutter-free. - One sensor light is off entirely?
If one of the sensor lights is completely off, this could point to a power issue. Inspect the wiring leading to the sensor to ensure it hasn’t become disconnected or damaged. Also, check for loose terminals or signs of wear. If the wiring appears intact, the issue could be related to a blown fuse or a problem within the garage door opener’s internal power supply. - Still having trouble?
If you’ve checked the above and the problem persists, there may be a deeper issue. The sensor itself could be defective, or there could be a malfunction within the garage door opener’s circuit board. It’s best to consult a professional technician for a thorough inspection and garage door repair in these cases.
Don’t hesitate to contact a qualified service provider if the problem remains unresolved.
Frequently Asked Questions
How to fix malfunctioning garage door sensors?
First, clean the sensor lenses with a soft cloth to remove dirt or dust. Then check if they’re aligned at the same height and facing each other, and make sure the wires are secure.
How do I fix my garage door sensor blinking red?
A red blinking light means the sensor is blocked or misaligned. Adjust the sensors, clean the lenses until both lights turn solid, and check for loose wires.
How do you reset a garage door sensor?
Turn off the opener or circuit breaker for about 30 seconds, then turn it back on. Ensure the sensors are clean, aligned, and facing each other—if so, they should reset automatically.
Why is my garage door sensor light blinking continuously?
Continuous blinking usually means the sensors are misaligned or something is in the way. Clean the lenses, check the wiring, and make sure the sensors are aimed directly at each other.
Should both sensors be green on the garage door?
Not always—usually, only the receiving sensor shows a green light, while the sending one may be yellow or amber. The sensors are working correctly as long as both lights are on and steady.
Conclusion
Understanding how to reset a garage door sensor is essential for homeowners. With just a few tools and attention to detail, you can quickly and safely resolve many standard sensor issues.
Maintaining clean lenses, ensuring proper alignment, and checking the wiring regularly can prevent future malfunctions. When in doubt, or if the problem persists, professional help ensures the job gets done right.
If you’re in Houston and need fast, reliable garage door sensor repair, contact Premium Garage Door Repair for expert service and guaranteed results.
End Note
Premium Garage Door Repair in Houston, TX is your trusted partner for sensor resets, opener troubleshooting, and complete system diagnostics. We help homeowners resolve garage door issues with accuracy and care.
Visit our company page to learn more about our approach, or explore our comprehensive services, including emergency garage door repair, garage door cable repair, and off-track door fixes.
We proudly serve the Downtown Houston, Montrose, and wider Houston service area. For more tips and insights, visit our blog or contact us today to schedule your repair.
Premium Garage Door
6002 Duxbury St, Houston, TX 77035
(844) 744-0044